| LithUnwrap
|
|
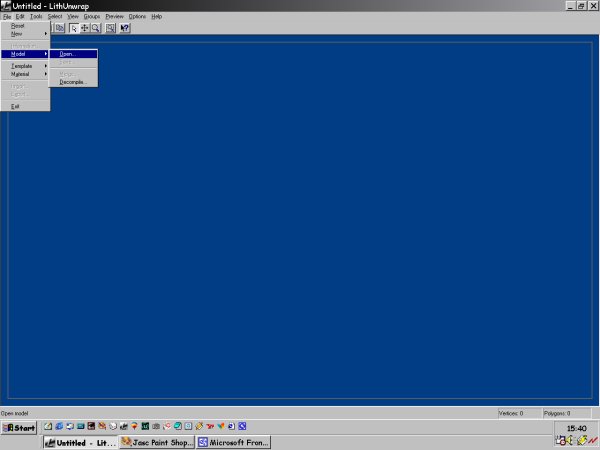
| Real easy one this....
Here we have Lith when you first open it..Hit "file"...the "model"...then open...
|
|
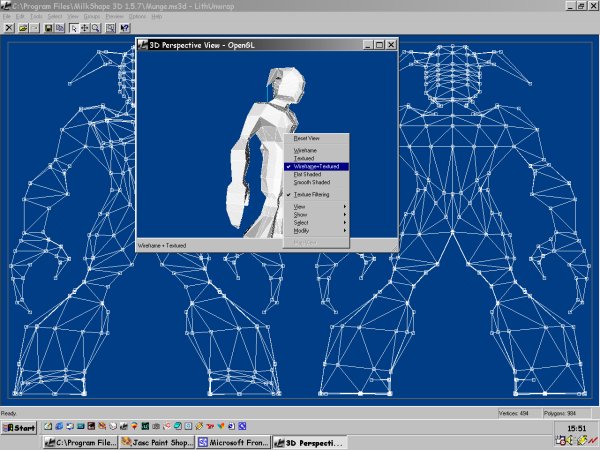
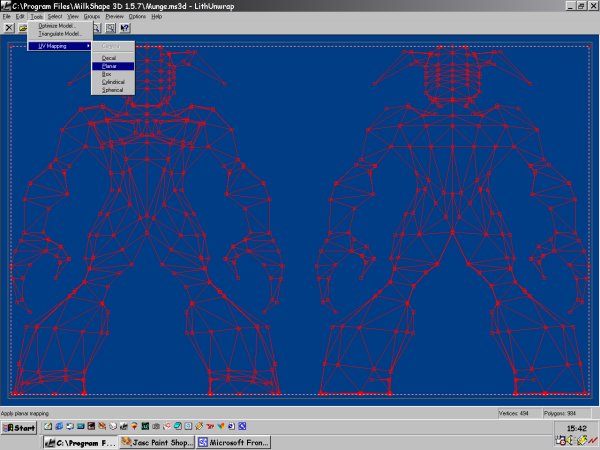
| When you have opend your model..use the select tool (the
little arrow) and select (left mouse drag) all the verts..or faces...you
can pick what you want to select in...yes, you guess it..the select menu.
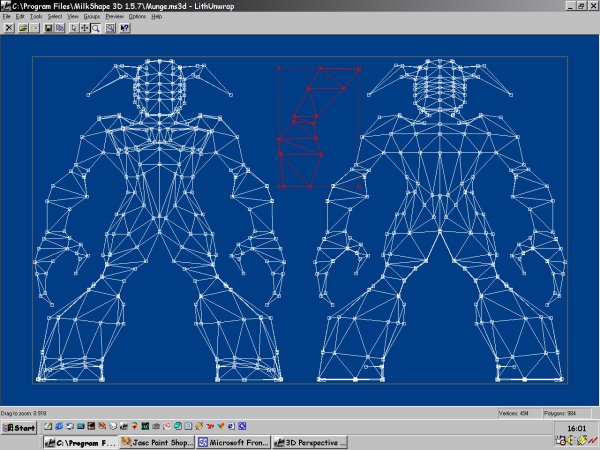
Once everything is selected go to "tools", "UV Mapping" and then "planar" this will produce something like the pic here...half your model might be upsidown but don't worry will fix that..
|
 |
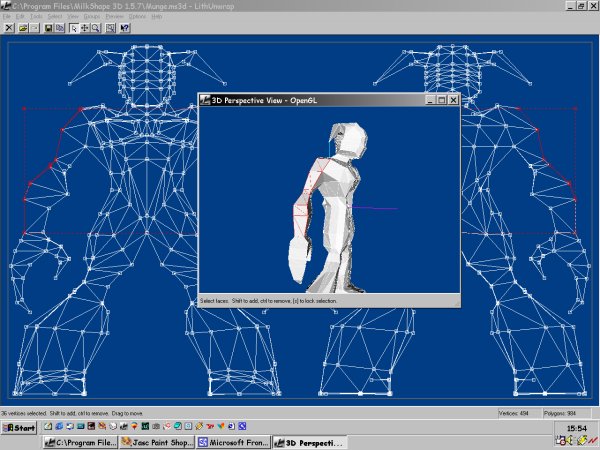
| If part is upsidown at the moment..select it again by
draging over it and go to edit...flip..vertical..there we go..both the
right way round now. At this point..you could actually re-save your
model..and save the template and your ready to paint your
skin..but..you'll have stretching on the edges, as they are not properly
mapped yet. But..Lith has just made a skin map for ya and it only took 20
seconds..and about 4 mouse clicks....impressive..anyway..
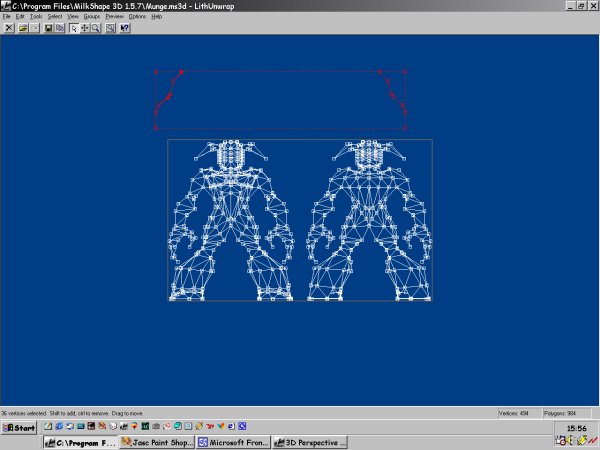
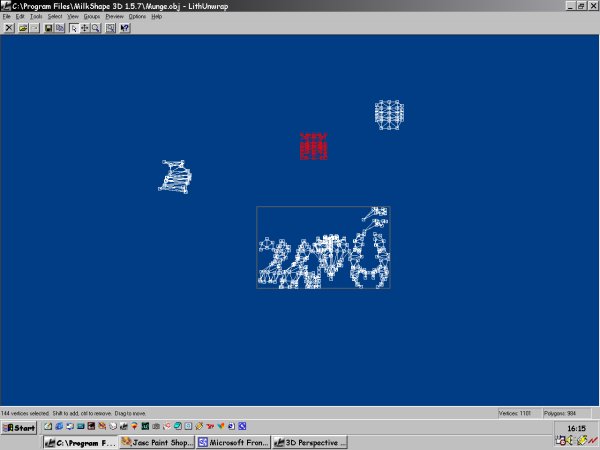
What we do is to go to preview mode...right click anywhere in preview mode..and select Wireframe+Textured..then..do again (right click) and go to select>>faces.. We can now select just the side of the arms...Left click on the faces you want..while holding Shift down (shift allows multi face selection) As you can see..the flat view behind is also being selected... Once you have the faces you want selected...go back to the main view..left click and move your selection. You can zoom out to give you more room to play here..With your arms still selected..go to tools..Uv mapping again..and select planar again but this time change your axis..to x maybe...And cool..we now have our arm mapped from the side..and still using only Planar mapping...You might have to adjust the scale..so just hit the S key while selected..and adjust.. |
|
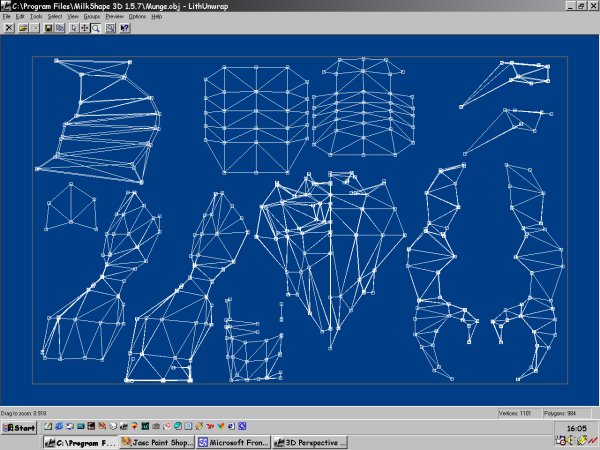
| Once happy..move the new mapped arm back into the mapping Box...the grey lined box is where everything has to be within to be able to be mapped onto a model. | 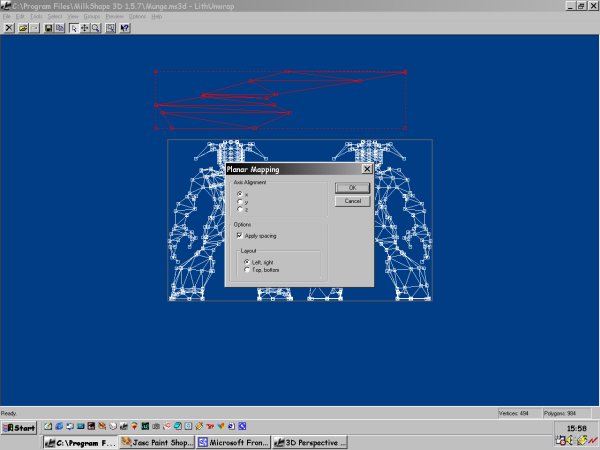 |
| Repeat this process until you have mapped the edge of your
model...selecting in the preview mode..and moving, scaling and replacing
in the edit view mode...you can flip bits..rotate..double up..and overlap
same mapping sections..like arms..If your arms are the same..just mirror
one of em and place it over the other to save space...with some creative
playing around and face manipulation you can get some very effective skin
layouts..
|
 |
| When you are totally happy..re-save your model..and Save the Template (texture) and your ready to go and paint... | |
| The Important bits to remember are..selecting the faces you
want, and playing around with the UV Mapping..in tools...try to always use
planar...select different planar angles (X, Y, Z) for best results...
Use your space: Zoom out from the mapping area and spread selections around...this allows you to be able to place em back into the mapping area more efficiently and save more space. Read the ReadMe file!!!!!...it has all the short cut keys listed for selection tools...zoom tools...everything. And last but not least...Experiment.....play around...use the tool...try all the buttons..try different ways to map things try box mapping..cylidrical mapping..have fun with it..But remember most game engines only like ONE type of mapping co-ords per model..so Planar is the way to go..
|
|